Pass custom variables to delivery template
In your delivery, you can use different types of data that can be utilized for personalized content for your customers.
To add a custom variable directly to the delivery from the workflow, you will need to
- create delivery variable placeholders in your delivery template
- set values to variables within the initialization script of the delivery activity
Create delivery variables
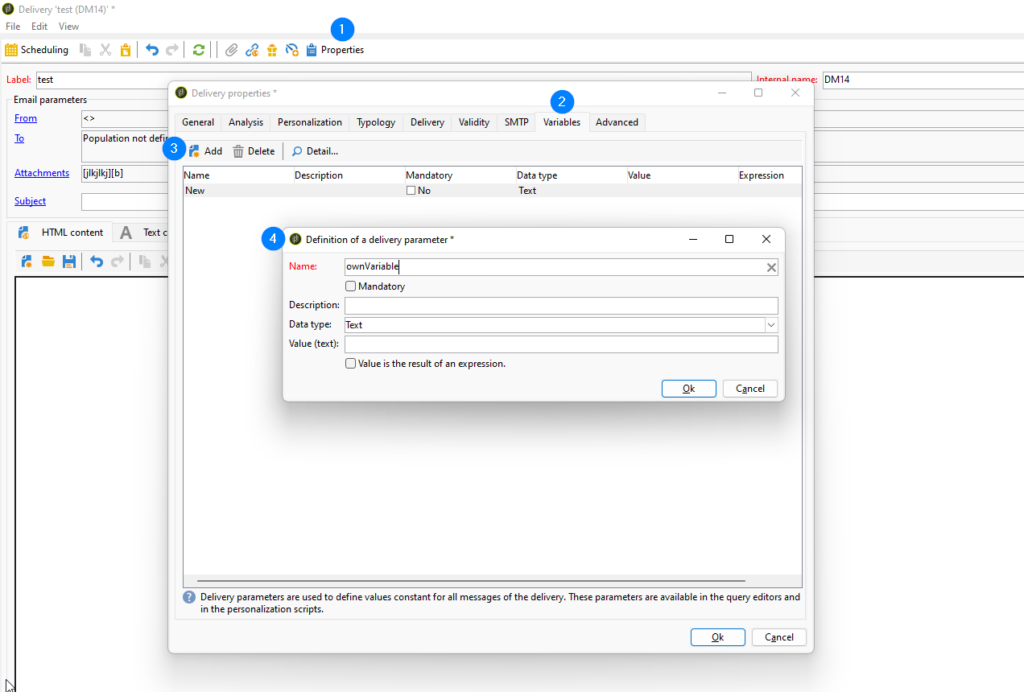
First, you need to create placeholders for delivery variables within your delivery template. These placeholders serve as containers for values we will set later withing the delivery object modification script.

- Open delivery template properties
- Navigate to the Variables tab.
- Add as many variables as you need
You can choose from text, longText, int, float, and date types. Personally, I often opt for text, and when dealing with JSON arrays, I use longText.

Set values of delivery variables
Now that we have created delivery variables, we can populate them within the object modification script of the delivery activity. Take a look at the XML source of the delivery template for further insights about where we can find these variable placeholders.

We can see varibales just under the deliveyr element and can be accessed under the path delivery.variables
<delivery>
  <variables>
    <var calculated="false" dataType="7" doubleValue="0" longValue="0" name="ownDate"
         required="false"/>
    <var calculated="false" dataType="5" doubleValue="0" longValue="0" name="ownFloat"
         required="false"/>
    <var calculated="false" dataType="3" doubleValue="0" longValue="0" name="ownInt"
         required="false"/>
    <var calculated="false" dataType="12" doubleValue="0" longValue="0" name="ownLongText"
         required="false"/>
    <var calculated="false" dataType="6" doubleValue="0" longValue="0" name="ownText"
         required="false"/>
  </variables>
To set values for these variables, access them as you would an array. Pay attention to the order in which you save your variables; the same order must be followed when setting values. In the script above, note that to access the string variable ‘ownText,’ you would need to access the last item in the array
delivery.variables._var[4].stringValue = 'hello';
Now that we have successfully set the variables, we can begin to use them within the delivery template. You can direcly type the variable within the personalization script
<%=variables.ownText%>
Alternatively, if you’re uncertain, you can access them from the dropdown menu. This method is similar to how you access variables from the workflow or recipient.


